
I have watched a lab buy a case of 2 mL vials that would not seat in their autosampler tray, and I have watched a QC group chase a phantom retention-time drift for two weeks before someone measured the inlet liner OD with a caliper. Both failures came down to the same thing: nobody matched the consumable dimensions to the instrument. The supplier sold a part number, the buyer assumed the part number meant “fits my machine,” and the gap between those two assumptions cost real money.
This guide is about closing that gap. Not the price, not the lead time, not the paperwork. The physical dimensions: the millimeter you cannot see, the tolerance nobody prints on the website, and the geometry that decides whether your autosampler grabs the vial or drops it.
Chromatography consumables are a dimensional product before they are a chemical product. A vial, a cap, a septum, a liner, a ferrule, a nut. Every one of those is defined by a drawing with tolerances in millimeters or inches. The chemistry of the septa matters, but if the septum is 0.5 mm too thick, the autosampler needle will not reach the sample, or the cap will not crimp, or the headspace pressure test will fail.
I have a simple rule now. Before I approve any new consumable from any chromatography supplier, I pull the instrument manual, find the “consumables and accessories” dimensional table, and compare it line by line against the supplier’s drawing. If the supplier cannot produce a drawing with tolerances, I do not buy. That is a hard line, and it has saved me more than one failed validation.
The reason this matters more than it used to is that instrument platforms have converged on a handful of standard geometries, and suppliers have rushed to cover all of them with fewer SKUs. The result is a market full of parts that are “compatible with” a platform but not dimensionally identical to the OEM part. Sometimes that is fine. Sometimes it is a 0.3 mm difference that changes your %RSD from 0.8% to 4%.
The three dimensions that cause most problems
In my experience, three dimensions account for the majority of fit failures:
- Vial outer diameter and height. A standard 2 mL autosampler vial is nominally 12 x 32 mm. The 32 mm is the critical one. A vial that measures 32.4 mm will lift the tray gripper or jam a carousel. A vial at 31.7 mm can sit low enough that the needle bottoms out short of the sample.
- Septum thickness. Standard 11 mm septa run 0.9 to 1.0 mm for a crimp or snap cap. A 1.3 mm septum in a snap cap designed for 1.0 mm will not fully seat and the cap will ride high.
- Inlet liner outer diameter. Split/splitless liners are commonly 4.0 mm OD for standard inlets and 2.0 mm or 1.8 mm ID for narrow-bore work. A liner that is 4.1 mm OD will not drop into a 4.0 mm inlet body without force, and force is how you crack the inlet weldment.
None of these are exotic. All of them are on the drawing. The problem is that the drawing is not always on the product page, and the sales rep does not always know.
Autosampler vial geometry: the 12 x 32 mm standard and where it breaks
The 12 x 32 mm vial is the closest thing the industry has to a universal standard, and it is codified in the ASTM E2363 and E2889 families and referenced in USP <1058> for analytical instrument qualification. That does not mean every 12 x 32 mm vial is interchangeable. The nominal dimensions are standardized; the tolerances are not.
What to measure on the vial itself
When I qualify a new vial lot, I measure ten vials with a digital caliper and record:
- Body OD at the shoulder and at the base. Shoulder OD should be within ±0.1 mm of 12.00 mm. Base OD can run slightly under to allow for mold draft; if it runs over, the vial will not drop into the tray well.
- Overall height from base to the top of the crimp ring. Target 32.00 mm ± 0.20 mm. Outside that band, autosamplers with fixed needle depth start missing.
- Neck ID. This one is often ignored. A neck ID that is 0.2 mm under nominal will not accept a 6 mm stir bar and will cause needle bending on some platforms.
- Bottom geometry. Flat-bottom vials are for autosamplers that draw from a fixed depth; conical-bottom (often called “high recovery”) vials are for platforms that can reach the cone. Mixing the two on the same tray is a common source of low-volume errors.
The OEM vial product line is a good example of why I insist on drawings. The difference between a vial that runs cleanly at 0.5% RSD and one that runs at 2% is often 0.15 mm of height variation across the lot.
Glass vs. plastic: the dimensional consequences
Glass vials hold their dimensions better across temperature. Plastic (polypropylene) vials swell and shrink with solvent exposure and temperature, and the swelling is not uniform. A PP vial that measures 12.05 mm at 20 °C can measure 12.15 mm at 40 °C after 24 hours in acetonitrile. If your autosampler tray has 12.2 mm wells, you are fine. If it has 12.1 mm wells, you have a jam waiting to happen on a hot Monday morning.
My rule: use glass for anything that runs above 30 °C or in strong solvents. Use plastic only for aqueous, room-temperature work, and check the tray well clearance before you commit.
Closures and septa: the millimeter that decides whether the needle reaches the sample
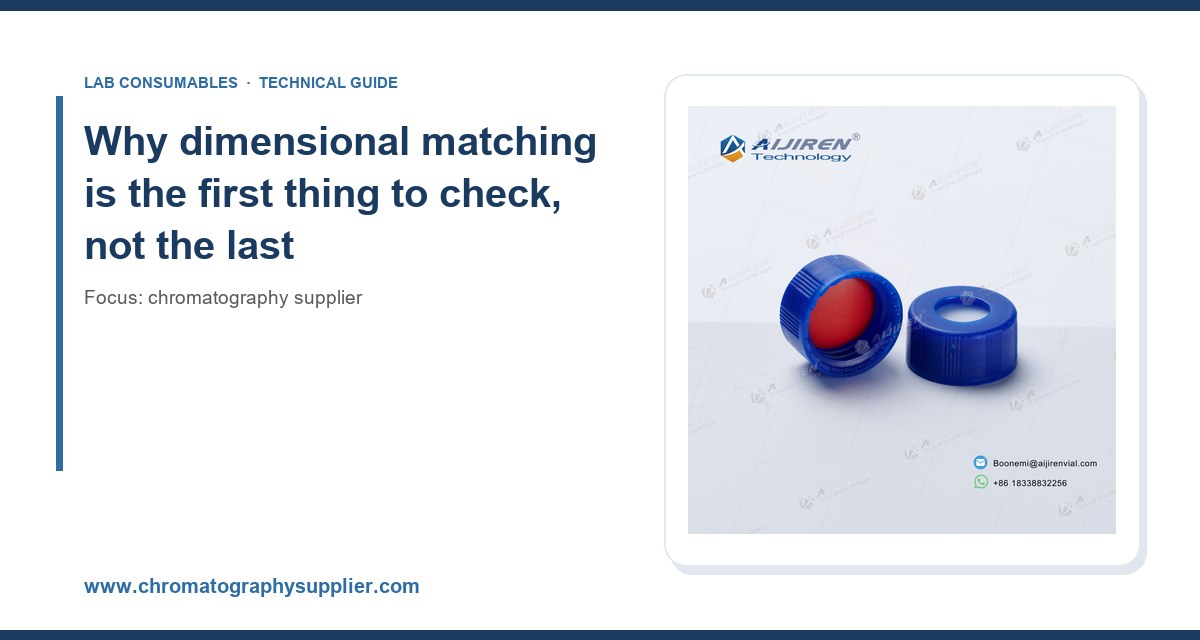
Closures are where dimensional matching gets genuinely tricky, because the cap and the septum are two parts that must work together and with the vial. The vial closures range covers the main families, but the selection logic is what matters.
Crimp vs. snap vs. screw: dimensional implications
Each closure family has its own dimensional logic:
- Crimp caps (11 mm). The aluminum seal compresses the septum against the vial neck. The critical dimension is the crimp height, typically 5.5 to 6.0 mm from the top of the cap to the bottom of the crimp ring. Under-crimp and the seal leaks; over-crimp and you crack the neck. A properly set crimper should deliver a leak-tight seal at 0.5 to 0.8 N·m of applied torque on a manual crimper, or per the manufacturer’s setting on an automatic one. I check crimp integrity monthly with a pressure decay test at 1.5 bar.
- Snap caps (11 mm). No crimper, but the snap geometry is less forgiving. The cap must seat fully, and “fully” means the underside of the cap skirt is flush with the vial shoulder. If the septum is 0.2 mm too thick, the cap will not snap down, and the autosampler gripper will grab the cap instead of the vial. That is a classic jam.
- Screw caps (9 mm or 10-425). The thread pitch and the cap height are the dimensions to watch. A 9 mm screw cap on a 9 mm vial is fine; a 10-425 cap on a 9 mm vial is a mismatch that will not seal, no matter how hard you torque it. Screw caps should be torqued to 0.5 to 1.0 N·m; more than that and you deform the septum and create a coring risk.
Septum thickness and needle penetration
The septum is the part that gets punctured, so it has a finite life. For a standard 1.0 mm silicone/PTFE septum, I plan on 30 to 50 punctures before the septum starts to core or leak. For a pre-slit septum, that number can go to 100 or more, but pre-slit septa have their own issue: they can let solvent vapor escape faster, which matters for volatile analytes and for headspace work.
The dimensional trap here is that a thicker septum (say 1.3 mm) will survive more punctures but will also change the needle depth by 0.3 mm. On an autosampler with a fixed needle depth, that 0.3 mm can mean the difference between drawing from the liquid and drawing from the headspace above it. If you switch septum thickness, re-check the needle depth on the first run.
Inlet liners and ferrules: matching the OD to the inlet body
The inlet is where dimensional errors get expensive, because the inlet is a precision-machined part and the liner is a glass tube that has to slide in without force. A split/splitless inlet on a modern GC typically takes a 4.0 mm OD liner, but the ID and the length vary by application.
Liner selection by application
Here is the decision table I use:
- Split mode, high concentration: 4.0 mm OD, 78.5 mm length, 2.0 mm ID, deactivated glass wool. The wool catches non-volatiles and protects the column.
- Splitless mode, trace analysis: 4.0 mm OD, 78.5 mm length, 2.0 mm ID, single taper, no wool. Wool in splitless mode can cause analyte adsorption and peak tailing.
- On-column injection: 4.0 mm OD, but with a narrow ID (0.32 to 0.53 mm) and a tapered tip that mates with the column. The taper geometry is critical; a taper that does not match the column ID will cause a leak or a dead volume.
- Programmable temperature vaporizer (PTV): 4.0 mm OD, but often shorter (around 54 mm) and with a specific baffle geometry. Using a standard 78.5 mm liner in a PTV inlet will not seat.
The liner length is the dimension that catches people. A 78.5 mm liner in an inlet designed for a 78.0 mm liner will sit 0.5 mm high, and the septum nut will not seal. I have seen this cause a slow air leak that took a week to find. If you are not sure of the length, measure the old liner with a caliper before you order.
Ferrules: the torque that matters
Ferrules are small, but they are the most common source of leaks and the most common cause of column damage. The dimensional issue is the ferrule ID vs. the column OD. A 0.25 mm ID column has an OD of about 0.37 mm; a 0.32 mm ID column has an OD of about 0.45 mm. Using a ferrule sized for 0.32 mm on a 0.25 mm column will not seal; using a 0.25 mm ferrule on a 0.32 mm column will crack the column.
Torque values: graphite ferrules should be tightened to hand-tight plus one-quarter turn, which is roughly 0.4 to 0.6 N·m. Vespel/graphite ferrules need a bit more, around 0.6 to 0.8 N·m, and they should be re-tightened after the first thermal cycle. Over-tightening is the number one cause of column breakage at the inlet. I keep a small torque wrench on the bench for exactly this reason.
A dimensional compatibility checklist you can actually use
Here is the checklist I hand to new lab technicians on their first week. It is not exhaustive, but it catches the failures I see most often.
- Vial: 12.00 mm OD ± 0.1 mm, 32.00 mm height ± 0.20 mm, neck ID matches the autosampler needle guide.
- Cap: 11 mm crimp or snap, crimp height 5.5 to 6.0 mm, torque 0.5 to 0.8 N·m.
- Septum: 1.0 mm thickness for standard work, 1.3 mm only if the autosampler needle depth is adjustable, puncture count logged.
- Liner: 4.0 mm OD, length matches the inlet (78.5 mm standard, 54 mm PTV), ID matches the injection mode.
- Ferrule: ID matches the column OD (0.37 mm for 0.25 mm column, 0.45 mm for 0.32 mm column), torque 0.4 to 0.8 N·m.
- Column nut: thread matches the inlet (typically 1/16 inch or 1/8 inch), no cross-threading.
If any of these numbers do not match the instrument manual, stop and call the supplier before you install. That single habit has saved me more instrument downtime than any other.
Where suppliers get dimensions wrong, and how to catch it
I have bought from enough chromatography suppliers to know that the failure modes are predictable. Here are the ones I see most often, and how I catch them.
The “compatible with” trap
A supplier lists a vial as “compatible with Agilent, Thermo, Shimadzu, and Waters autosamplers.” That is a marketing statement, not a dimensional one. The Agilent chromatography consumables and columns catalog lists the exact dimensions for each platform; so does the Thermo Fisher chromatography and sample handling documentation. Cross-check the supplier’s drawing against those tables, not against the marketing copy.
The tolerance that disappears
Some suppliers publish a nominal dimension but not a tolerance. A vial listed as “12 mm” with no tolerance is a red flag. The tolerance is the part that determines whether the vial works in your tray. If the supplier cannot tell you the tolerance, assume it is ±0.3 mm and plan accordingly.
The lot-to-lot drift
Even a good supplier can drift between lots. I ask for a certificate of analysis with dimensional data on the first lot and then spot-check every tenth lot with a caliper. The Restek technical resources include good guidance on what to measure and how often.
Troubleshooting: when the fit is wrong, here is what to check first
When a run fails and I suspect a dimensional issue, I work through this list in order. It is faster than guessing.
- Autosampler jam or “no vial detected”: measure vial height and OD. Check cap seating. Check tray well diameter against vial OD.
- Needle bending or coring: check septum thickness and needle depth. A 0.3 mm mismatch is enough to bend a 23-gauge needle.
- Leak at the inlet: check ferrule ID vs. column OD, check liner length, check septum nut torque.
- Peak tailing that appeared overnight: check for a cracked liner or a swollen ferrule. Both are dimensional failures.
- Retention time drift: check for a slow leak at the septum or the ferrule. A 0.1 mm gap at the ferrule is enough to shift retention time by 0.2 minutes over a run.
- Low recovery on a high-recovery method: check vial bottom geometry. A flat-bottom vial in a conical-bottom method will leave 20 to 30 microliters behind.
If the checklist does not find it, the next step is a leak test at the inlet and a dimensional audit of the last lot. I have never had a dimensional problem that survived both.
What I recommend, in concrete terms
If you are setting up a new method or qualifying a new supplier, here is what I would do. Buy glass 12 x 32 mm vials with a published tolerance of ±0.1 mm OD and ±0.2 mm height. Use 11 mm crimp caps with 1.0 mm silicone/PTFE septa, crimped to 0.5 to 0.8 N·m, and log puncture counts. Use 4.0 mm OD liners matched to the inlet length (78.5 mm for standard split/splitless, 54 mm for PTV). Use ferrules sized to the column OD, torqued to 0.4 to 0.8 N·m, and re-tightened after the first thermal cycle. Ask for a drawing with tolerances before you buy, and spot-check every tenth lot with a caliper.
None of that is exotic. It is the difference between a consumable that works and a consumable that costs you a week. The analytical testing labs I work with have all adopted some version of this checklist, and the ones that have report fewer failed runs and fewer instrument service calls. The U.S. EPA SW-846 test methods are a good reference for the dimensional and performance requirements that matter in regulated work.
The takeaway is simple: match the dimension before you match the price. A vial that fits costs a few cents more than one that does not, and the one that does not will cost you far more than the difference in the first week.
References & further reading
Related resources from our lab consumables network:
- Chromatography Supplier at chromatographysupplier.com
- Oem Vial at oemsamplevials.com
- Vial Closures at vialclosures.com
- Analytical Testing at labanalyticaltesting.com
External references and standards: